Roblox block textures are crucial for game aesthetics and player immersion. Understanding how to customize and implement these visual elements can dramatically elevate your creations within the platform. This guide delves into why textures matter, where to find them, and how to effectively apply them to your builds, ensuring your Roblox experiences stand out from the crowd. Discover trending techniques and essential tools to transform basic blocks into stunning environmental assets. Whether you are a budding developer or an experienced builder, mastering block textures offers endless creative possibilities for your virtual worlds and interactive games. Learn the tricks that professional developers use to bring their visions to life, making your games more engaging and visually appealing. This informational journey will empower you to craft truly unique and memorable Roblox experiences, enhancing both gameplay and visual fidelity for a captivated audience. Elevate your building prowess and captivate players with vibrant, detailed, and optimized visual elements. This resource will help you achieve stunning results every time you build in Roblox Studio, ensuring your projects consistently impress and engage a wide player base.
Hey there, fellow Roblox player! Ever get a little overwhelmed trying to figure out how to make your builds look amazing, specifically with textures? You're definitely not alone. It's like wanting to bake a fancy cake but only having plain flour – you know there's more to it! We've all been there, staring at a block and wondering how to transform it into something truly special. This isn't just a simple guide; it's your ultimate living FAQ, updated for the latest Roblox Studio patches to help you master **block texture Roblox** elements. So, grab a coffee, and let's dive into making your games visually stunning and super engaging!
We will cover everything from the absolute basics of applying textures to advanced techniques like PBR, helping you understand why these visual details matter so much for player immersion. We'll explore where to find awesome textures, how to get them into your game, and even how to troubleshoot common issues that pop up. This comprehensive guide aims to address all your burning questions about making your Roblox creations shine, ensuring your builds are top-notch. You'll learn the ins and outs of texture customization, giving your games a professional and polished edge that will captivate players. Get ready to unlock the full potential of your creativity!
Most Asked Questions about Block Texture Roblox
Beginner Questions
What is a block texture in Roblox and why is it important?
A block texture in Roblox is simply an image applied to a part's surface, giving it visual detail beyond a solid color. It's crucial because textures define the aesthetic and mood of your game, transforming basic shapes into realistic or stylized objects. Effective texturing significantly enhances player immersion and makes your world feel alive, moving beyond generic default visuals. This visual layer is key to creating engaging and memorable experiences within the platform.
How do I apply a basic texture to a block in Roblox Studio?
Applying a basic texture is straightforward. First, select your block in Roblox Studio. In the 'Properties' window, locate the 'Material' dropdown and choose a built-in material like 'Wood' or 'Brick'. For custom images, open 'Asset Manager', upload your image, then find the 'TextureID' property in the block's 'Properties' window and select your uploaded asset. This process immediately updates the block's appearance, bringing your custom visuals to life effortlessly.
Where can I find free or paid textures to use in my Roblox game?
You can find textures from various sources. For free options, check websites like Pexels, Unsplash, or royalty-free texture sites, always minding usage rights. Paid, high-quality textures are available on platforms such as Textures.com or ArtStation Marketplace, offering professional-grade assets. The Roblox Creator Marketplace also features user-generated textures and materials. Always prioritize reputable sources to ensure quality and legal compliance for your game assets.
How do I make a texture tile seamlessly on a larger surface?
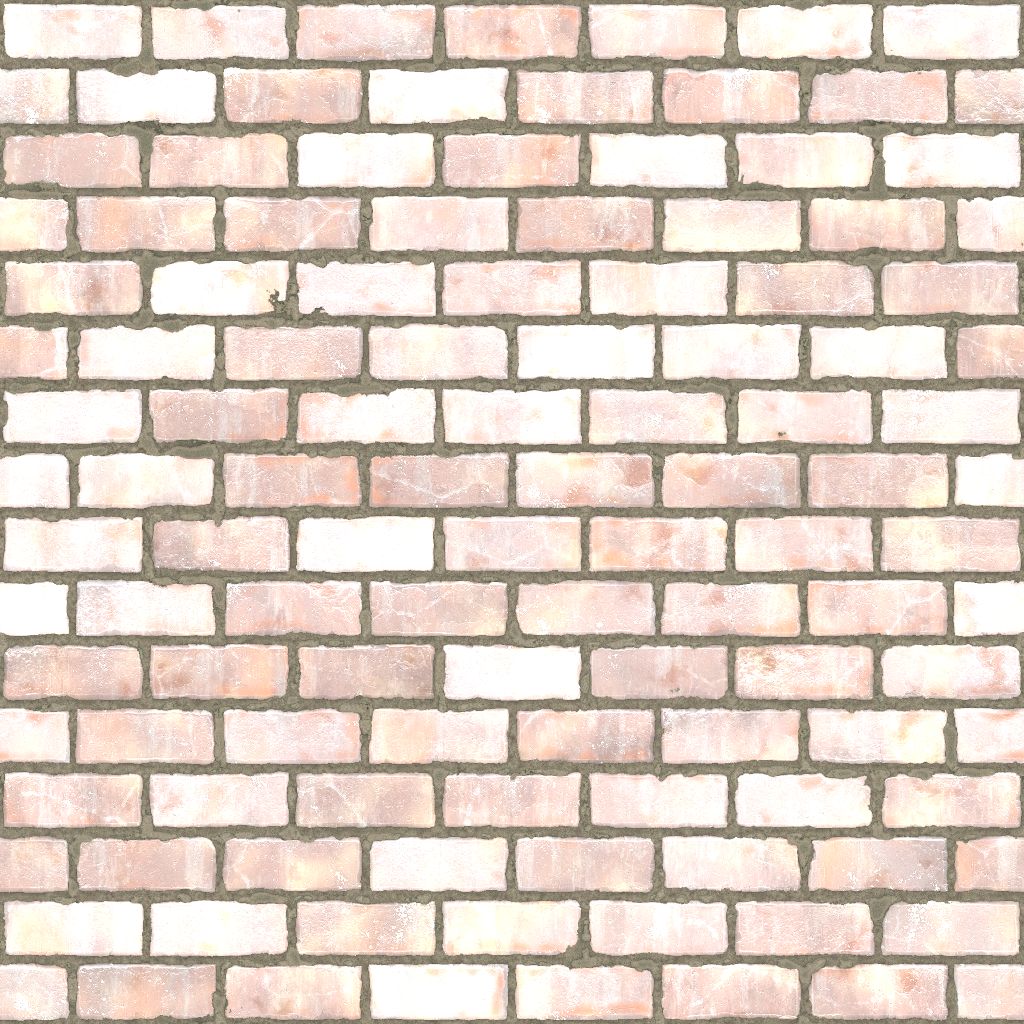
To make a texture tile seamlessly, you need a **seamless texture Roblox** image where all edges blend perfectly with the opposite edges. Many texture websites offer seamless versions. In image editing software, you can use offset filters to create them. When applying in Studio, adjust the 'TextureScale' property in the 'Properties' window carefully. This ensures the texture repeats without visible seams or awkward breaks, crucial for large, continuous surfaces like walls or floors, maintaining a polished look.
Tips and Tricks
What are some common mistakes to avoid when using textures in Roblox?
Common texture mistakes include using low-resolution images that appear blurry when stretched, leading to a pixelated look. Over-tiling a very repetitive texture can also create an unnatural pattern, breaking immersion. Neglecting texture optimization, such as using too many high-resolution textures, can severely impact game performance. Inconsistent texture styles across your game also lead to a disjointed visual experience. Always test your textures on various devices to catch these issues early, ensuring a smooth and visually appealing game for all players.
How can I make specific parts of a texture transparent or mask areas?
To make parts of a texture transparent or mask areas, you'll need to use an image file that supports an alpha channel, typically a PNG. The alpha channel defines areas of transparency. For more control, you can apply a 'Decal' or 'SurfaceGui' to a part and use an image with transparency. Within a 'SurfaceGui', you can also layer multiple images and scripts to dynamically mask areas. This technique is invaluable for creating intricate decals, transparent windows with patterns, or weathered effects on surfaces, offering fine-tuned visual customization.
Guide How to use PBR textures for realistic materials in Roblox?
Using PBR (Physically Based Rendering) textures creates incredibly realistic materials. You'll need multiple texture maps: Albedo (color), Normal (surface bumps), Roughness (shininess), and Metallic (metalness). Import these maps into Roblox Studio. Create a 'SurfaceAppearance' object inside your MeshPart. Assign each texture map to its corresponding property within 'SurfaceAppearance'. This allows the Roblox engine to accurately simulate how light interacts with your material, producing lifelike reflections, shadows, and surface details that dramatically enhance visual fidelity. Experiment with different map combinations for diverse effects.
How do you troubleshoot common texture loading or display bugs?
Texture loading or display bugs can be frustrating. First, check your internet connection for upload issues. Verify the 'TextureID' in the 'Properties' window is correct and points to an uploaded asset. Ensure the asset is approved and loaded in 'Asset Manager'. Sometimes, Roblox Studio itself might have a caching issue; restarting the program can resolve it. For MeshParts, ensure you have a 'SurfaceAppearance' object with correctly assigned maps. Check for any error messages in the 'Output' window for specific clues. Often, a small typo or a missing asset is the culprit.
Builds & Classes
Can different Roblox materials like 'Wood' or 'Metal' affect how a texture looks?
Yes, different Roblox materials absolutely affect how a texture looks, even if you apply a custom image using 'TextureID'. This is because each 'Material' in Roblox Studio comes with its own inherent physical properties like shininess, reflectiveness, and even how light scatters through it. For example, applying your custom texture onto a 'Plastic' material will still give it a somewhat glossy, smooth appearance, while applying the same texture to 'Metal' will make it reflect light like metal. The 'Material' essentially acts as a base layer of realism and light interaction. Choosing the right base material complements your custom texture, enhancing the overall visual effect and helping convey the object's true nature effectively. It's a powerful combination for creating diverse visual styles.
Endgame Grind
What are the future trends for graphics and textures in Roblox development?
Future trends in Roblox graphics and textures are leaning heavily towards even greater realism and dynamic environments. Expect continued advancements in PBR materials, with more sophisticated rendering options and easier creation workflows within Studio. Procedural generation for textures and terrain will likely become more prevalent, allowing for vast and varied landscapes with minimal manual effort. Real-time global illumination and ray tracing support, though currently experimental or limited, could further revolutionize lighting and reflections. User-generated content will continue to push creative boundaries, with a focus on optimized, high-fidelity assets. The aim is to bridge the gap between Roblox's blocky aesthetic and modern AAA game visuals, offering developers powerful tools for creating breathtaking and immersive experiences that are performant and accessible to a broad audience.
Still have questions?
Don't hesitate to dive deeper into the Roblox Developer Hub or explore community forums. For more specific guides, check out our articles on 'Advanced Lighting Techniques in Roblox' and 'Scripting Interactive Elements in Your Roblox Game'.
Ever wondered how some Roblox games look so incredibly polished and visually stunning? How do developers achieve that level of detail with simple blocks? The secret, my friend, often lies in mastering **block texture Roblox** elements. This isn't just about slapping an image onto a cube; it is an art and a science that can transform your game from basic to breathtaking. We are talking about making your creations truly pop in 2024 and beyond. This comprehensive guide will walk you through everything, helping you become a texture wizard.
Many creators ask, "Why are textures so important in Roblox Studio?" Textures provide the visual layer over your 3D models and blocks, giving them color, pattern, and perceived surface detail. Without them, everything would be flat, monochromatic, and quite frankly, boring. Think of them as the skin of your game world, bringing depth, realism, or a unique stylized look to every corner. Proper texture usage enhances player immersion and helps convey your game's unique atmosphere effectively.
Understanding Roblox Textures Why They Matter
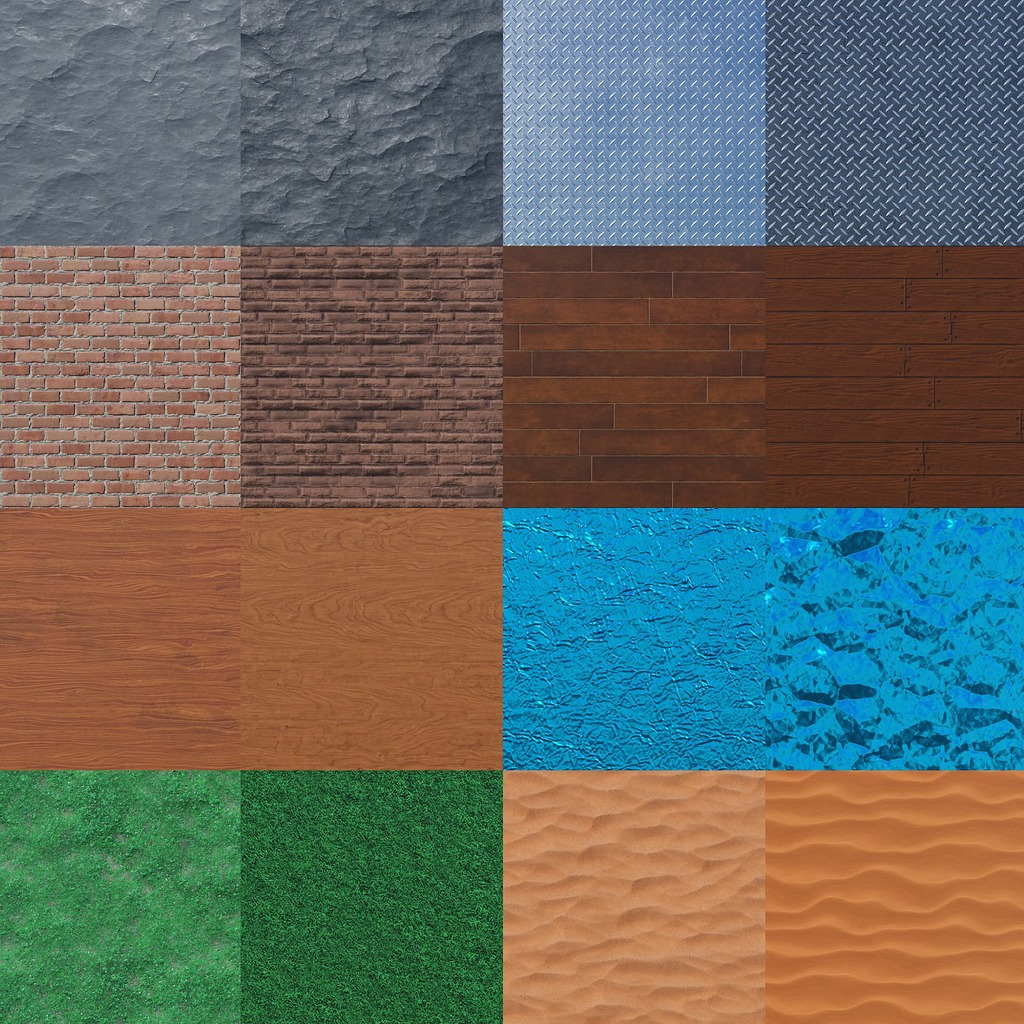
In the vibrant universe of Roblox, **Roblox custom textures** are paramount for distinguishing your game. They dictate the visual feel, setting the mood and atmosphere for players. From rustic wood planks to sleek metallic surfaces, textures breathe life into your virtual environments. A well-chosen texture can communicate information about objects, like showing wear and tear on an old wall or the shininess of a new gadget. This level of detail keeps players engaged and helps tell your game's story visually. Neglecting textures means missing a huge opportunity to connect with your audience.
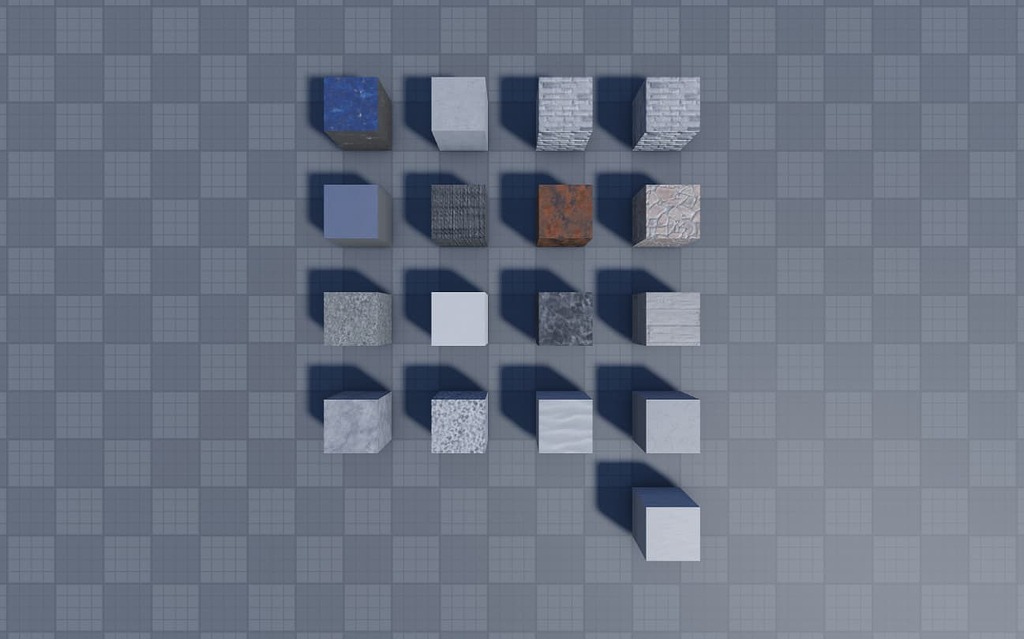
We have all seen those games where every block looks generic, right? That is where understanding how to change Roblox block appearance truly shines. You can take a default gray brick and make it look like ancient cobblestone, futuristic steel, or even a vibrant, whimsical jelly. This customization capability is a core strength of Roblox Studio, allowing boundless creativity. It empowers developers to craft unique visual identities for their experiences, moving beyond the platform's standard assets. Think of it as painting a masterpiece rather than just sketching outlines.
Getting Started Importing Custom Textures
So, you are ready to ditch the default textures and bring in your own flair? Excellent choice! The process of **Roblox Studio texture import** is quite straightforward once you know the steps. First, you need your image files. These should be high-quality JPEGs or PNGs, ideally square resolutions like 256x256 or 512x512 pixels for optimal performance and clarity. Once you have your textures prepared, you will upload them directly into Roblox Studio as Decals or Image Assets. This makes them available for use on any part or mesh in your game.
Where to Find Awesome Roblox Textures?
Finding the perfect texture is a quest in itself, but a rewarding one! Many developers flock to sites like Textures.com, Pexels, or even royalty-free image repositories for high-quality images. Remember to check licensing. You can also create your own from scratch using photo editing software like Photoshop or GIMP, giving you complete creative control. Some **Roblox texture packs** are also available, offering collections of themed textures ready for import. Always prioritize quality and resolution to maintain a professional look. The Roblox Creator Marketplace also has user-generated textures to explore.
Applying Textures in Roblox Studio
Applying a texture to a block in Roblox Studio is surprisingly simple. Once your texture is uploaded, select the part you wish to texture. In the Properties window, locate the 'TextureID' property. Click on the box, and a window will pop up allowing you to select your uploaded image asset. Voila! Your block now sports its new look. You can apply textures to basic parts, meshes, and even terrain using this method. Experiment with different textures on various parts to see what amazing combinations you can create. This basic skill forms the foundation of all advanced texturing techniques.
How Do You Scale and Tile Textures Effectively?
Applying a texture is one thing, but making it look right is another. **How to change Roblox block appearance** effectively often involves scaling and tiling. In the Properties window, look for 'TextureScale' or similar properties depending on the object. Adjusting these values lets you control how many times the texture repeats (tiles) across the surface of your part. If your texture looks stretched or too small, playing with these settings is your next step. You want to avoid obvious seams and repetitive patterns where possible to achieve a seamless look. It's a delicate balance of resolution and scale.
Optimizing Performance with Block Textures
Beautiful textures are great, but not at the expense of game performance. High-resolution textures on too many parts can significantly impact framerates, especially for players on lower-end devices. This is where **texture optimization Roblox** comes into play. Use lower resolution textures for objects far from the player or less important details. Consider using texture atlases, which combine multiple smaller textures into one larger image, reducing draw calls. Always test your game on various devices to ensure a smooth experience for everyone. A visually stunning game that lags constantly will quickly lose players. Smart optimization is part of being a responsible developer.
Advanced Texture Techniques for Pros
Ready to level up your texturing game? Dive into **PBR textures Roblox**. PBR stands for Physically Based Rendering, and these textures simulate how light interacts with real-world materials. They involve multiple maps like Albedo (color), Normal (surface detail), Roughness (shininess), and Metallic (metalness). Implementing PBR materials adds an incredible layer of realism and depth to your builds, making them react beautifully to lighting. While more complex to set up, the visual payoff is immense. This technique is often seen in the most visually impressive games on the platform, showcasing a commitment to high fidelity.
What Are the Best Practices for Creating Seamless Textures?
Creating textures that tile perfectly without visible seams is crucial for professional-looking environments. This is a common challenge for new and experienced creators alike. The key is to use **seamless textures Roblox** practices. Many image editing programs offer tools specifically for creating seamless patterns. Look for 'offset' or 'make seamless' filters. When designing your own textures, ensure that the edges of your image blend perfectly with the opposite edges. Test your textures frequently in Studio by tiling them repeatedly on a large part. A truly seamless texture disappears into the background, enhancing immersion rather than breaking it. Practice makes perfect in this area.
Beginner / Core Concepts
You're just starting, and that's awesome! Understanding the basics of block textures in Roblox can feel a bit like learning a new language, but you've got this. It's all about getting comfortable with how images make your game pieces look more interesting. We'll tackle some fundamental questions that usually pop up first, helping you get a solid footing before you dive into the really cool stuff. It's like learning to walk before you can run, and soon you'll be sprinting into advanced building techniques. Don't worry about making mistakes; every great builder started right here.
1. **Q:** What is a block texture in Roblox and why should I care?
**A:** Think of a block texture in Roblox as the skin or wrapping paper for your game objects. Instead of a plain, single-colored block, a texture is an image that gets applied to its surface, giving it detail, pattern, and color. I get why this confuses so many people; it's more than just a color change. You should care because textures are what make your game visually appealing and unique. They transform a simple cube into a wooden crate, a brick wall, or a grassy patch, making your world feel real and immersive. Without textures, your game would look incredibly bland and generic, failing to capture players' attention. It's the difference between a rough sketch and a vibrant painting, truly bringing your vision to life and enhancing the player experience. You've got this! Try experimenting with some default textures first to see the immediate impact.
2. **Q:** How do I find and use the basic built-in textures in Roblox Studio?
**A:** Finding and using built-in textures in Roblox Studio is actually super easy, and it's a great starting point for any new builder. This one used to trip me up too until I realized how accessible they are! Just select any part in your workspace, then look over at the 'Properties' window on the right side of your screen. Scroll down a bit, and you'll find a property called 'Material'. Click on the dropdown menu next to it, and boom! You'll see a whole list of default materials like 'Wood', 'Brick', 'Grass', 'Plastic', 'Neon', and many more. Selecting one instantly changes your block's appearance, often with an associated texture and physical properties. It's a quick way to add visual variety without needing any custom files. You've got a fantastic array of options right at your fingertips to start making your builds more engaging and diverse. Try this tomorrow and let me know how it goes!
3. **Q:** Can I put my own pictures on blocks, and how do I do that?
**A:** Absolutely, you can put your own pictures on blocks, and it's where the real fun begins for customizing your Roblox world! This is often referred to as using **Roblox custom textures**. I totally understand wanting to move beyond the default options. First, you'll need an image file saved on your computer, ideally a square one like 512x512 pixels. In Roblox Studio, go to the 'View' tab, then open the 'Asset Manager'. Click the 'Bulk Import' button and upload your image. Once uploaded, select the part you want to texture, and in its 'Properties' window, find the 'TextureID' property. Click the little square next to it, and a window will pop up where you can select your newly uploaded image. It will instantly appear on your block! This empowers you to create truly unique elements, from custom signs to intricate patterns. You're now on your way to making your game uniquely yours, so keep experimenting with different images!
4. **Q:** What's the difference between 'Material' and 'TextureID' for a block?
**A:** This is a fantastic question, and it's something that often confuses new builders, so you're not alone in asking! Think of 'Material' as the base physical properties and a default look for your block, like 'Plastic' making it shiny or 'Wood' giving it a wood grain and a specific feel. It's a preset package of appearance and behavior. 'TextureID', on the other hand, is literally just an image you overlay onto that block, independent of the material's physical properties. You can apply a custom image (your 'TextureID') onto a block that still has the 'Plastic' material. The texture will appear, but it will still behave and reflect light like plastic. Essentially, 'Material' defines the fundamental nature of the surface, while 'TextureID' layers a specific visual pattern on top. Using both smartly allows for incredible visual fidelity and customization. You're getting the hang of the subtle nuances now!
Intermediate / Practical & Production
Alright, you've got the basics down, and that's fantastic! Now it's time to roll up our sleeves and dive into the practical side of making your Roblox textures look amazing and perform well. We'll explore how to handle scaling, tiling, and even touch on some community resources. It's like moving from painting by numbers to understanding color theory and brush strokes. These techniques are what make your builds go from good to great, catching the eye of more players. You're stepping into the shoes of a game designer now, truly shaping the visual experience. Let's make your textures shine!
5. **Q:** How can I make my textures repeat smoothly without obvious seams on a large surface?
**A:** Making textures repeat smoothly without obvious seams is absolutely crucial for a professional-looking build, and I totally get why this can be a headache! The key here is using **seamless textures Roblox**. You'll want to ensure the image you're using as a texture is designed to tile perfectly. Many free and paid texture websites offer seamless versions, or you can create your own using image editing software like Photoshop or GIMP. Look for features like 'offset' filters that allow you to wrap the edges of your image, revealing any non-seamless areas you can then blend out. When applying in Studio, carefully adjust the 'TextureScale' property in the 'Properties' window to find the optimal tiling that minimizes repetition while avoiding stretching. It's a bit of an art, but practicing this will dramatically elevate your environment design. You're building truly immersive worlds now, so keep an eye on those details!
6. **Q:** What are texture packs, and how can I use them in my Roblox games?
**A:** **Roblox texture packs** are essentially collections of themed textures, often designed by other creators, that you can use to give your game a consistent and unique visual style. I often see people wondering if they're like Minecraft resource packs, and yes, the concept is similar! They usually contain a variety of images for different surfaces – wood, stone, metal, grass, and so on – all designed to match a particular aesthetic. To use them, you'd typically download the pack (ensure it's from a reputable source for safety!), then manually import each texture image into Roblox Studio via the 'Asset Manager', just like you would with any individual custom texture. Once imported, you apply them to your parts as usual. Using a texture pack can save you a ton of time on asset creation and help maintain visual cohesion across your entire game. It's a smart way to quickly elevate your game's visual fidelity and achieve a specific look with less effort. You've got this, experiment with different styles!
7. **Q:** How do I scale and position textures precisely on individual faces of a block?
**A:** Scaling and positioning textures precisely on individual faces of a block is a fantastic intermediate skill that gives you fine-tuned control over your visuals. I know it can feel a bit fiddly at first, but it's super powerful! Instead of simply applying a texture to the entire part, you'll want to use 'SurfaceGuis' or 'Decals' attached to specific faces. A 'Decal' allows you to project an image onto one face, and you can then adjust its 'StudsOffset' and 'StudsPerTile' properties in the 'Properties' window. This lets you control the size and position of the texture on that specific surface. For even more control, especially with UI elements or complex projections, 'SurfaceGuis' offer a flexible framework to display textures and even interactive elements on a block face. This precision lets you create intricate designs, readable signs, and unique surface details that truly stand out. Keep practicing, and you'll master this invaluable technique!
8. **Q:** My textures look blurry or pixelated. What could be causing this, and how can I fix it?
**A:** Oh, the dreaded blurry or pixelated texture – I get why this is frustrating; it totally ruins the visual punch! Usually, this issue boils down to a mismatch in resolution or compression. First, check the resolution of your original image file. If you're using a tiny 64x64 pixel image on a huge block, it will inevitably stretch and pixelate. Aim for textures that are at least 256x256 or 512x512 pixels, especially for visible surfaces. Second, ensure that when you're importing, Roblox isn't over-compressing it, although this is less common with modern Studio versions. Also, check your graphics settings in Roblox; sometimes lower quality settings can downsample textures. A quick fix is often to simply use a higher-resolution source image and ensure your 'TextureScale' isn't making it stretch excessively. Remember, better source quality almost always leads to better in-game appearance. You're on the right track by identifying the problem early!
9. **Q:** Are there any tools or plugins in Roblox Studio that can help with texture management?
**A:** Yes, absolutely! There are some fantastic tools and plugins in Roblox Studio that can seriously streamline your texture management, making your life as a developer much easier. I've seen countless hours saved by leveraging the right resources. The built-in 'Asset Manager' (found under the 'View' tab) is your primary hub for organizing all your uploaded images and other assets, helping you keep track of your custom textures. Beyond that, the Roblox Creator Marketplace offers numerous community-made plugins specifically designed for builders. Look for plugins that offer features like 'Texture Combiners' (for creating atlases), 'Material Flip' tools, or 'Bulk Texture Appliers'. These can help you quickly apply textures to multiple parts or even swap out entire sets of textures efficiently. Always check reviews and ensure plugins are reputable before installing. These tools are game-changers for boosting your workflow and productivity. You're wisely seeking out efficiencies, and that's a sign of a pro!
10. **Q:** How do I make textures look like they have depth or bumps without adding more geometry?
**A:** Making textures look like they have depth or bumps without adding extra geometry is a super clever trick that optimizes performance while enhancing visuals! This is where 'Normal Maps' come into play, a core component of **PBR textures Roblox**. I used to think every bump needed a new polygon, but no! A normal map is a special texture (it usually looks purplish-blue) that tells the game engine how light should reflect off a surface, simulating tiny details like cracks, grooves, or rough patches. You apply a normal map alongside your main color texture to a MeshPart (or a Part with a custom MeshID) that has a 'SurfaceAppearance' object. You simply upload your normal map to the 'NormalMap' property. The engine then uses this information to fake the illusion of depth when light hits it, making flat surfaces appear highly detailed. It's a powerful way to add realism without performance overhead. You're diving into advanced visual wizardry now, awesome!
Advanced / Research & Frontier
Alright, you've mastered the fundamentals and the practical applications of Roblox textures. Now, we're venturing into the cutting edge, exploring techniques that push the boundaries of visual fidelity and creativity within Roblox. This is where you truly differentiate your game, tapping into the power of advanced rendering and innovative asset creation. We'll talk about PBR, procedural textures, and optimizing for the absolute best player experience. Think of it as moving from expert painter to an artistic director, dictating the entire visual language. Get ready to elevate your game to the highest level, making it stand out in a crowded marketplace. This is where innovation happens.
11. **Q:** What are PBR textures in Roblox, and how do they achieve more realistic rendering?
**A:** PBR, or Physically Based Rendering, textures in Roblox are a game-changer for achieving stunning realism, and they're definitely a hot topic in current year Roblox development! I remember when this technology felt like magic, but it's based on real-world physics. Instead of just a single color image, PBR uses multiple texture maps – like Albedo (color), Normal (fake bumps), Roughness (how shiny or dull it is), and Metallic (if it's metal or not). These maps tell the Roblox engine how light should interact with the surface in a physically accurate way. This means materials look correct under various lighting conditions, reflecting light, and showing detail much more naturally than traditional textures. By simulating how light behaves in the real world, PBR textures create incredibly convincing materials, making your game environments feel much more immersive and lifelike. You're now harnessing the power of modern rendering! Try creating a simple PBR material and observe its stunning real-time reactions to light sources.
12. **Q:** How can I create my own PBR texture maps for complex materials?
**A:** Creating your own PBR texture maps for complex materials is an incredibly rewarding skill, especially if you're aiming for top-tier visual quality in Roblox. It requires specialized software, but it's totally doable! I often suggest starting with programs like Substance Painter, Mixer, or even Blender's texture painting capabilities. These tools allow you to paint directly onto your 3D models (or generate maps from high-poly sculpts) and export the separate Albedo, Normal, Roughness, and Metallic maps. You'll layer different materials and paint details, letting the software generate the corresponding PBR maps. There are also fantastic resources online like textures.com that provide pre-made PBR material sets you can download and learn from. The key is understanding what each map controls and how they interact. With practice, you'll be crafting incredibly realistic surfaces that truly elevate your game's visual fidelity, making your creations feel professionally polished. You've got this, dive into those tutorials!
13. **Q:** What are some advanced techniques for optimizing textures for performance in large-scale Roblox games?
**A:** Optimizing textures for performance in large-scale Roblox games is absolutely critical; a beautiful game that lags is no fun for anyone! This is where advanced strategies like using **texture atlases** become indispensable. Instead of having dozens of small texture files, you combine many into one large image (an atlas). This significantly reduces draw calls, which tells the graphics card to render fewer separate items, thus boosting performance. You'll then map different sections of that atlas onto various parts. Another technique is **LOD (Level of Detail) textures**, where objects far from the player use lower-resolution textures, swapping to higher-res ones as they get closer. Also, being mindful of texture memory usage by compressing textures (while maintaining visual quality) can help. Always profile your game's performance in Roblox Studio to identify bottlenecks. Smart texture management is the mark of an experienced developer committed to delivering a smooth player experience. Your players will thank you for the smooth gameplay!
14. **Q:** How do developers use scripts to dynamically change block textures in-game?
**A:** Using scripts to dynamically change **block texture Roblox** elements in-game is a super cool and advanced technique that opens up tons of interactive possibilities! Imagine a wall crumbling or an item changing its appearance based on player actions – that's scripting in action. You'd typically use a local script to reference the part and its 'TextureID' property. Then, using events (like a player touching it, a timer, or a specific game state), you can change that 'TextureID' to another pre-uploaded image asset. For instance, `part.TextureID =
Customizing Roblox block textures enhances game visuals and player engagement. Learning texture application is essential for aspiring Roblox developers. Discover tools and techniques for importing and applying textures effectively. Block textures can transform simple builds into immersive environments. Stay updated with trending texture design practices for modern Roblox games. Optimizing textures improves game performance and visual quality. Understanding the impact of texture resolution is key for performance. Explore PBR textures for realistic lighting and material effects. Leverage community-created texture packs for rapid development. Master texture mapping and scaling for precise visual control. Implement UI textures to refine your game's user interface. Debug common texture issues efficiently within Roblox Studio. Utilize scripting to dynamically change textures in game. Learn about future trends in Roblox graphic fidelity. Enhance player experience through consistent and appealing visuals.
35


ROBLOX Textures 436 Dev Textures Mod For Source Engine Source Mods . Roblox Texture Template Latest. Feedback On PBR Textured Blocks Creations Feedback Developer Forum . My Texturepack Roblox . How To Use Textures ROBLOX STUDIO 2024 YouTube


Create A Realistic Brick Texture In ROBLOX Studio Tutorial YouTube . How To Make STUD TEXTURE In Roblox Studio 2026 YouTube . Pre 2022 Texture Pack Community Resources Developer Forum Roblox 2 1024x1024 . Community Resources Developer Forum Roblox 2 1024x639 . 8423 Best R Roblox Images On Pholder This Guy Is Pretty Famous


Roblox Textures 76 . Importing Texture Art Design Support Developer Forum Roblox . Roblox Textures Poliigon 900px. How To Use Textures In Roblox Studio YouTube . Studs Material In Blender Creations Feedback Developer Forum Roblox


Granite Texture Roblox . Roblox Texture Map Render Texture Roblox KVBXC . Roblox 2026 Logo REVEALED New Color New Look YouTube Maxres2 . Help With Texture Art Design Support Developer Forum Roblox . How To Get Back The Old Stud Texture EASILY Includes Meshes Unions


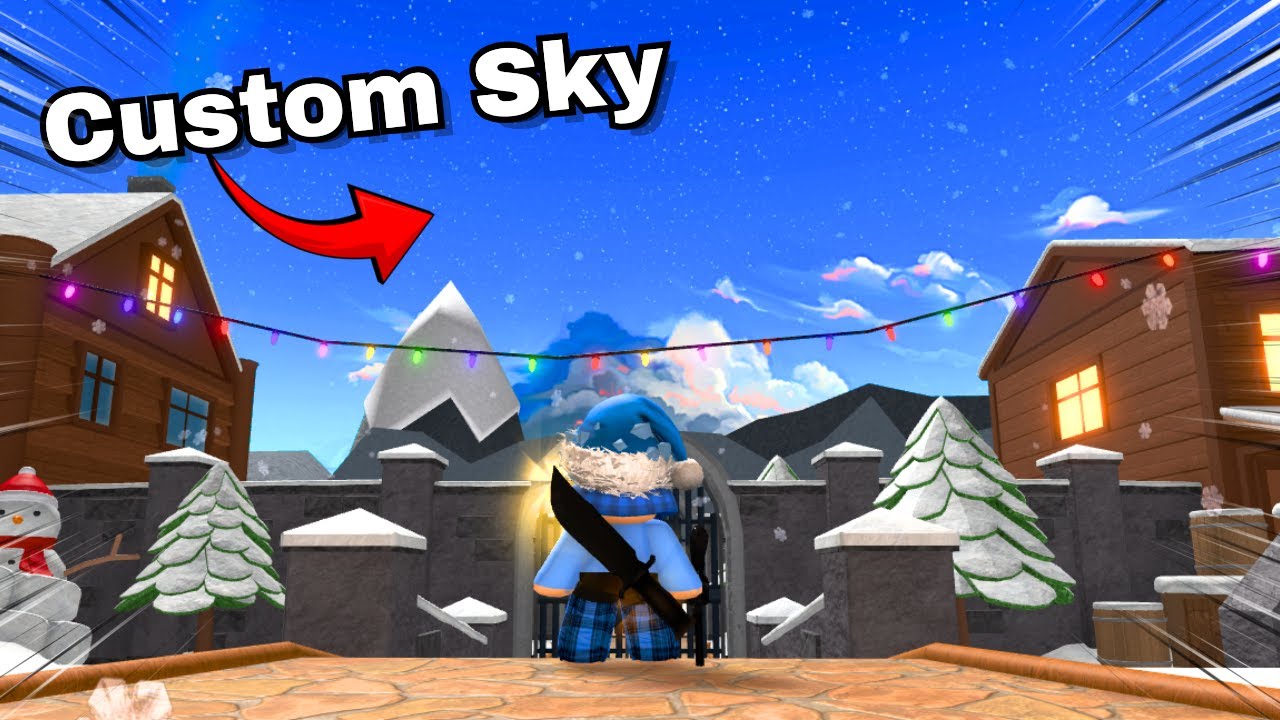
Roblox Shirt Texture Template Prntbl Gov Co Roblox Lead Image Cnnu . All Roblox Part Textures PRE JUNE 2021 Community Resources . Stuck In Low Graphics Studs Texture Art Design Support Developer . How To Get Texture ID In Roblox 2026 YouTube . How To Unlock CUSTOM SKY Textures On Roblox 2026 YouTube


How To Get Back The Old Stud Texture EASILY Includes Meshes Unions . All Roblox Part Textures PRE JUNE 2021 Community Resources . How To REMOVE Textures In Roblox 2026 100 WORKING YouTube . How To Find The Texture Of Roblox Materials Building Support . How To Get Texture ID In Roblox 2026 YouTube


Premium Photo Exploring The Vibrant World Of Roblox Textures AR 32 Exploring Vibrant World Roblox Textures Ar 32 983420 55657 . Textures And Decals Roblox Creator Hub Texture Color3 255 0 100 . Texturas PBR Documentaci N Del Centro De Creaci N De Roblox AlphaMode TintMask Bricks Albedo . How To Get Dark Textures In Rivals Get BLACK TEXTURES Roblox Rivals . HOW To GET NO TEXTURES On ROBLOX RIVALS YouTube